Log Cabin Quilt Block
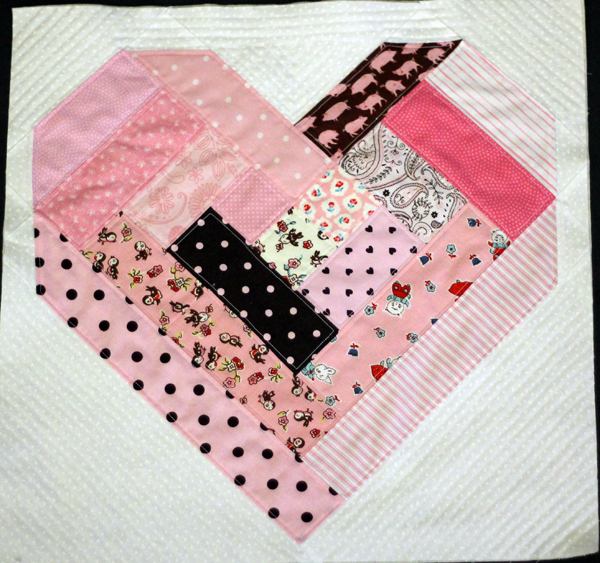
So I’d like to re-visit the block I made for February “Quilt as you Go”.

I was happy with how the block turned out but…..
I was REALLY trying to pull it all together before February was over. And I didn’t take the time to do the instructions right.
I hate doing a half-ass job. Jeeeeze……
I’m not doing the post over. (Well, I might re-do that diagram eventually)
But I thought I’d start at the beginning to explain log cabin blocks. Because it’s my favorite and probably was one of the reasons I started quilting.
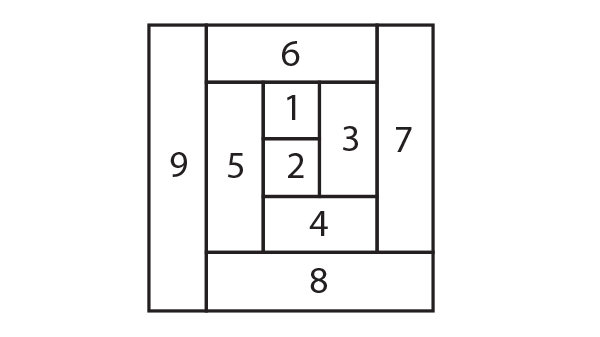
Here’s a VERY basic log cabin block.

And that’s the pattern I used to make this pillow that I mentioned last week. I used 4″ strips but it can be made in any size. Just make sure you add 1/2″ to the size.

And, just in case you want to make it, here’s the instructions:
This is a HUGE pillow. 24″ square. The finished strips are 4″ wide. So if you actually make it, you need to add 1/2″ to each strip for 1/4″ seam allowances.
You’ll need to cut:
2 4 ½” x 4 ½” (pieces 1 & 2)
2 8 ½ ” x 4 ½” (pieces 3 & 4)
2 12 ½” x 4 ½” (pieces 5 & 6)
2 16 ½” x 4 ½” (pieces 7 & 8)
1 20 ½” x 4 ½” (piece 9)
I also added a 3 1/2″ border around the pillow but the border didn’t follow the log cabin pattern.
2 20 ½’ x 4” (top and bottom)
2 27 ½’ x 4” (sides)
Just sew it together with 1/4″ seams and follow the numbered pieces. When the log cabin portion is finished, put the two shorter pieces of the border on the top and bottom. Put the two longer pieces on the sides.

Then quilt it onto a piece of batting or fleece.
For the back of the pillow, you’ll need two pieces of fabric
2 28″ x 18” pieces of fabric
Made a slipcover style pillowcase following my instructions here.
Sew 2” from all sides to create the flange.
Insert pillow.

Discover more from
Subscribe to get the latest posts sent to your email.

Where can I get the log cabin Heart pattern ?
Erlinda, if you go to the previous week’s post, you will see the pattern and step by step directions. https://designsbyktgreen.com/block-six-february-quilt-as-you-go/