Easy Peasy Fabric Christmas Tree DIY
I haven’t been posting as often as usual—just got over with our big event of the year–the Homosassa Arts, Crafts, and Seafood Festival. Lots of work but we raised lots of money to give back to our community.
The little bit of time I have had to sew has been spent on the Dinosaurs quilt for my grandson’s Christmas present. But it has been driving me slightly batty. So many little pieces to cut up and then sew back together. I had to move onto something else for a few days. (All this time and only six dinosaurs are done–out of 24!)
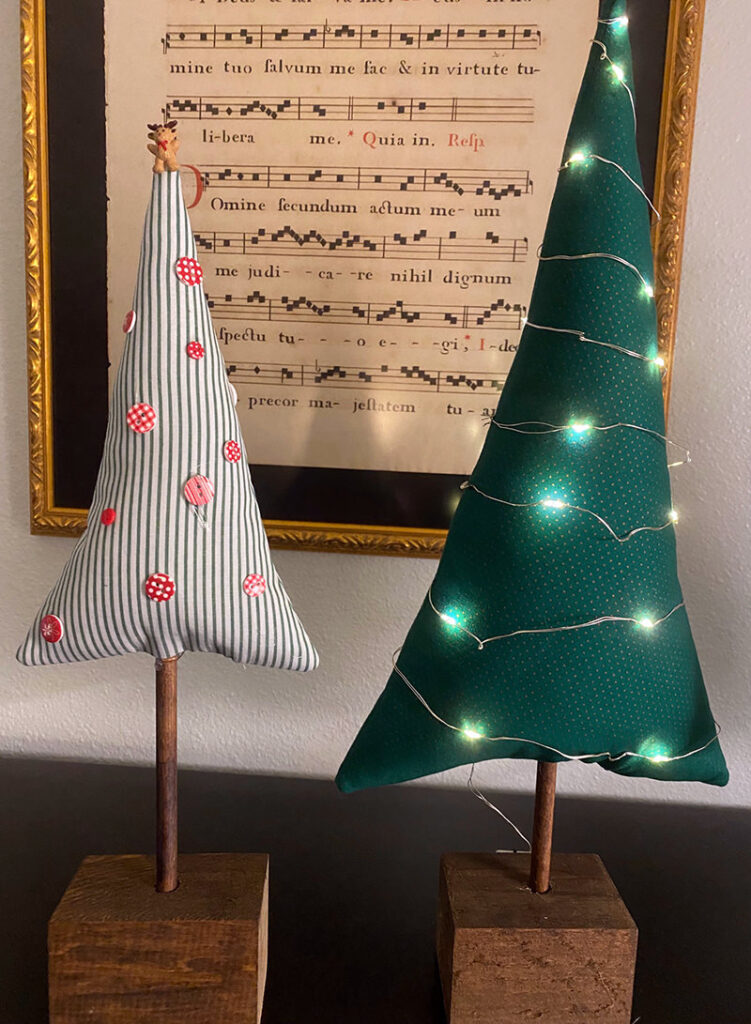
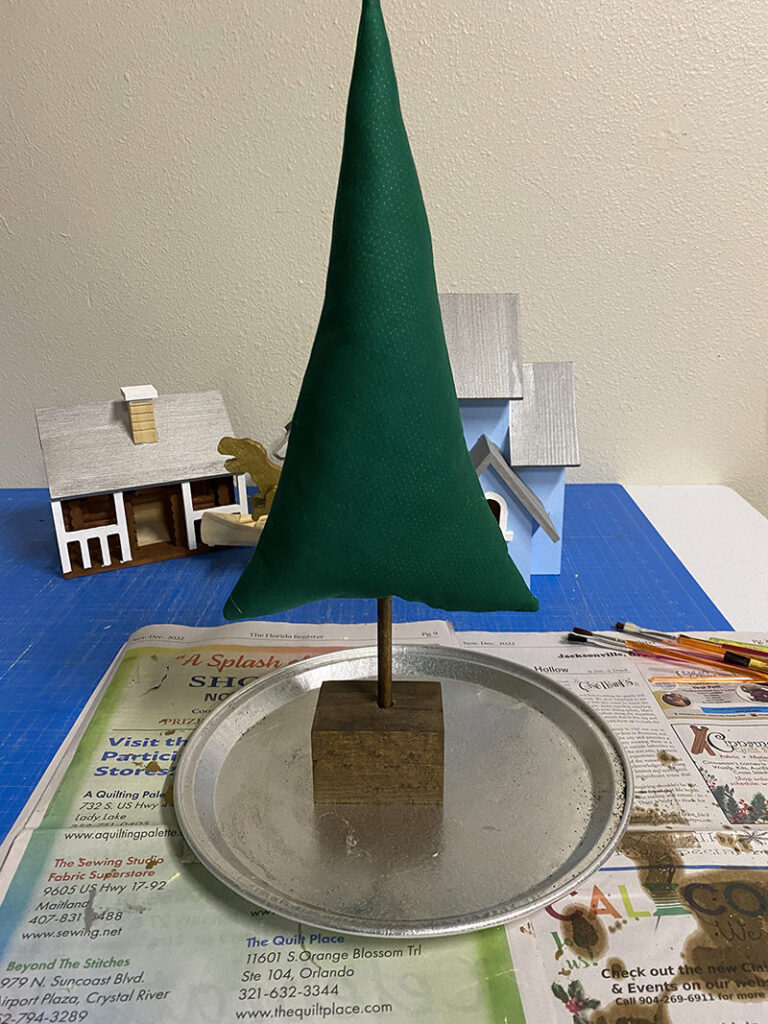
I had a couple of projects that I wanted to get done before Christmas. The first are these Christmas trees that Trisha brought in to share in “Sew Cool and Crafty”. While you can find these on Pinterest, I thought I’d write some instructions just in case you might want to make one or two or a forest! The second project is a Christmas Village made from bird houses. You might get a glimpse of how that is going in some of the photos.
First we have to make the base. I bought a package of dowels at Walmart. These were the exact length I needed but you can buy longer ones at Home Depot and other big box stores and cut them down.
I bought the blocks that the dowels go into at Hobby Lobby. Terry drilled holes in them for me then I stained the blocks and the dowels. I’m sure you could use any old left over blocks from other projects or pieces of tree limbs but I have a fear of cutting my fingers off so I don’t use power tools that might have that capability. I was happy to find these blocks already nicely cut. I did sand them a bit before staining because they were a little rough.
Make the Pattern
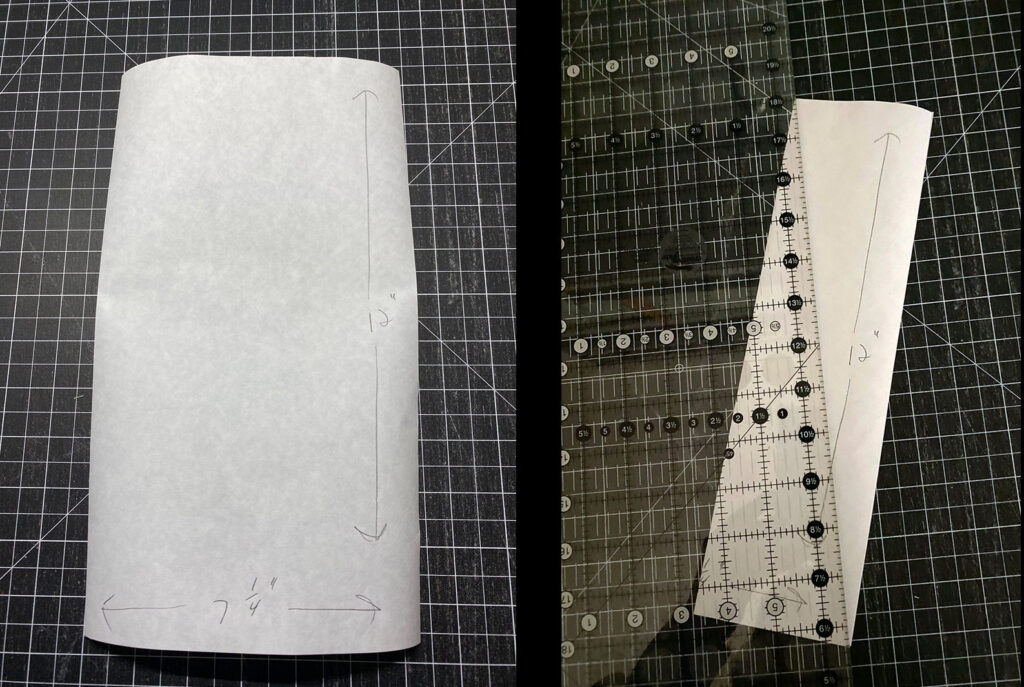
The pattern Trisha brought to us is 7 1/4″ wide x 12″ tall. You just need to draw angles from the edges to the center. I also made one larger tree and made a pattern 9″ wide by 15″ tall plus a 6″ wide by 10″ tall smaller tree .
I use freezer paper for my patterns. Because when you press it onto the fabric it is temporarily glued there. Pretty cool. And you can use the pattern several times. It still sticks.
The first tree I created was just a test. I used quilting cotton and stuffed it with poly fill. I thought it was a little lumpy. I didn’t finish that one. For the next 5 trees I added fusible fleece to the quilting cotton. This is totally optional—the trees are just fine without the fleece.
Cut out the Tree
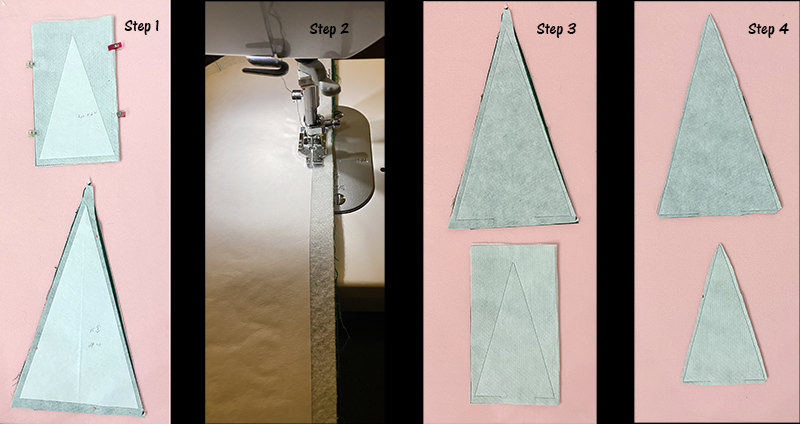
(Step 1) After pressing the freezer paper on to the wrong side of the fabric (or in my case fusible fleece), I pin the fabric together and take it directly to the sewing machine and (Step 2) sew around the pattern. I use a small stitchlength for “softies”–1.6. The typical stitch length is 2.5. Leave a couple inches open in the bottom for turning. (Step 3 shows the stitched trees before trimming.)
(Step 4) Trim around the tree (about 1/4″) and clip the points.
(Step 5.) Turn the tree right side out and (Step 6.) stuff it very firmly.
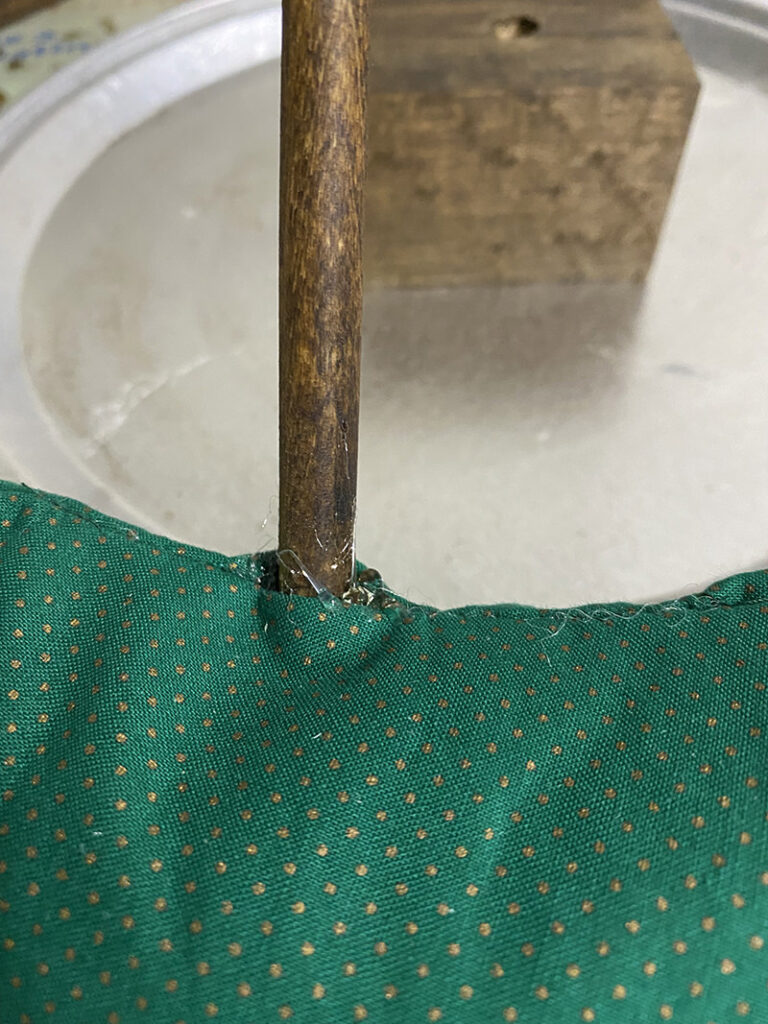
(Step 7.) Insert the dowel and then close the opening with a ladder stitch,
I hot glue around the dowel and put a glob of hot glue in the hole of the block.
Cram that dowel in there!
Now it’s time to embellish. The little snowballs on the green gingham tree are pom poms I cut off of trim. Have to say that I burnt the crap out of my fingers putting those little buttons on the small striped tree! I tacked the lights on the big tree with stitches here and there. Just in case the battery runs out, I can put a different set on easily. I still plan on decorating the bases and adding ribbons to the dowels.
At our last “Sew Cool and Crafty” workshop, we all brought our trees in and had an entire forest!

Lots of different ideas here! And easy peasy!
Now on to finishing my Christmas Village!
Hope everyone has a great Thanksgiving!
Discover more from
Subscribe to get the latest posts sent to your email.





Comments
Easy Peasy Fabric Christmas Tree DIY — No Comments
HTML tags allowed in your comment: <a href="" title=""> <abbr title=""> <acronym title=""> <b> <blockquote cite=""> <cite> <code> <del datetime=""> <em> <i> <q cite=""> <s> <strike> <strong>