DIY Potholder with Hanging Loop — Another Version
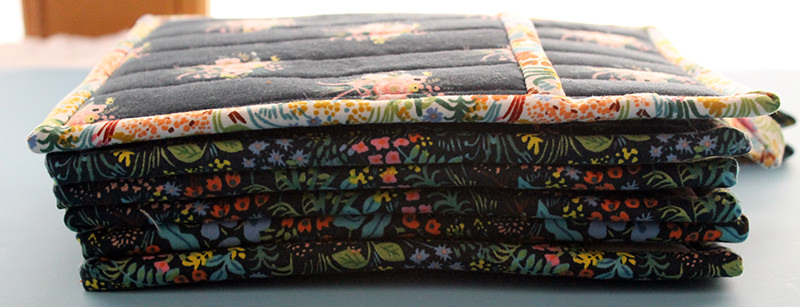 Okay, this is the LAST potholder diy. I’m moving on to hot pads next week.
And what is the difference? I’m saying that a potholder actually holds a pot—for instance it should be useful for grabbing the handle or handles on a hot pan or pot.
And a hot pad saves your expensive kitchen surfaces when you set the pot down.
Makes sense?
Of course, they are interchangeable. I’m often pick up my pots from the stove with the hot pad and then throw that pot holder onto the counter to set that pot. Just grabbing what ever is the closest.
But, I’m going with my definition!
For this version of the potholder with a hanging loop, I chose to use the quilt binding style. It just looks neater to me than the faux mitered style which I wrote about last week.
I usually make two or three of each project before I post a tutorial. Mostly to make sure that I’ve got it right!
I was headed to a Friendsgiving dinner and wanted to give our host and hostess potholders. So I made two potholders for testing and then gave them as gifts. They turned out REALLY nice!
I wanted the loop to be on the corner but there were too many layers of fabric and my sewing machine just couldn’t handle it. So I placed it in the middle and even that was a problem.
(When my machine hangs up it kind of reminds me of the Little Engine that could, it hits that thick spot and goes, I think I can, I think I can….)
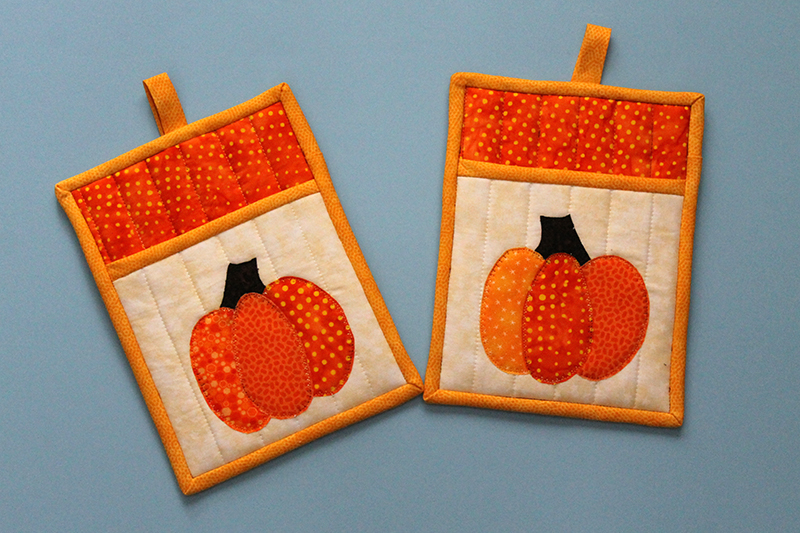
So here are the two potholders that I made my friends. They are amazingly adorable! I really wanted to keep them. But I was going to dinner that night and had to have a gift!
I downloaded this pumpkin applique pattern from Jacquelynn Steves’s blog. Her applique’s are fun and her tutorials are well done.
Then I moved onto the potholder for this tutorial. I spaced the ends of the loop a wee bit further apart and it made all the difference. The little engine said “I can do it!”
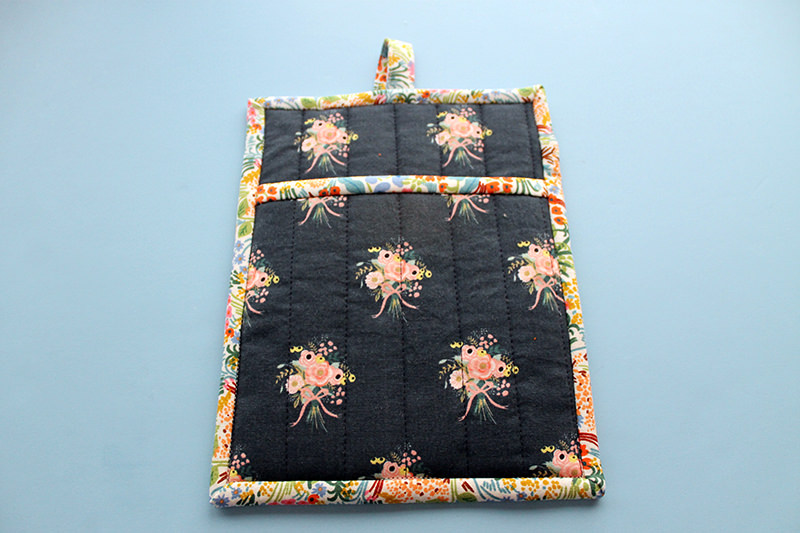
So here’s the tutorial. It’s basically the same one that I posted about in October. DIY Pretty Potholders. But with a hanging loop. I believe that I might be a bit more descriptive in that tutorial so if you have any questions, check it out. Or email me. I answer.
8” x 6 ½” Pot Holder with a pocket:
Two 6” x 6 1/2” piece for pocket (one for front of pocket and one for lining)
One 6″ x 6 1/2″ insul-brite for pocket
Two 8” x 6 ½” pieces for front and back
Two 8” x 6 ½” pieces of insul-brite
32″ x 2 1/2″ piece of fabric for the binding
5″ piece of 2 1/2″ fabric for loop
6 1/2″ x 2 1/2″ piece for trim on the pocket
First make a “quilt sandwich” with the piece for the front, two layers of of insul-brite and then the back then make a second quilt sandwich for the pocket of front, insul-brite, and lining. Glue the layers together with either a glue stick or temporary spray adhesive.
Quilt each sandwich.
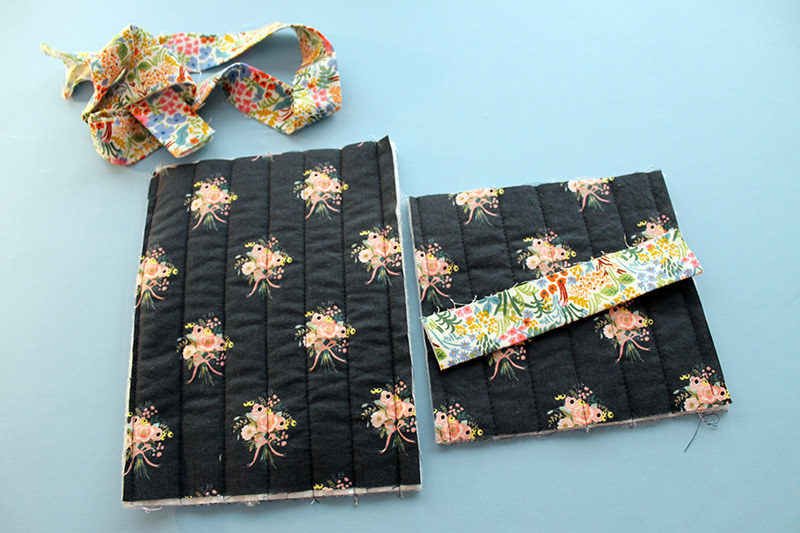
Add the trim onto the pocket just like putting binding on a quilt. Fold the strip in half lengthwise, press, put the raw edge of the strip onto the upper edge of the pocket and stitch with a 1/4″ seam allowance.
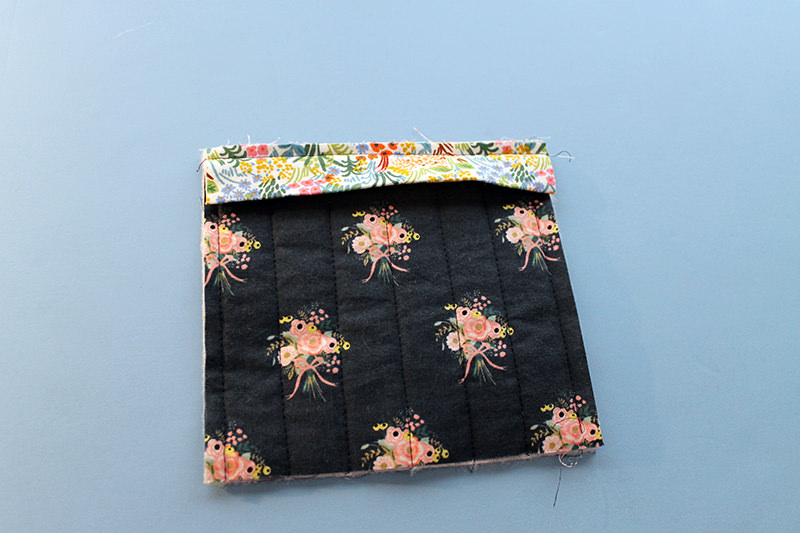
Turn the trim to the back and “stitch in the ditch”.
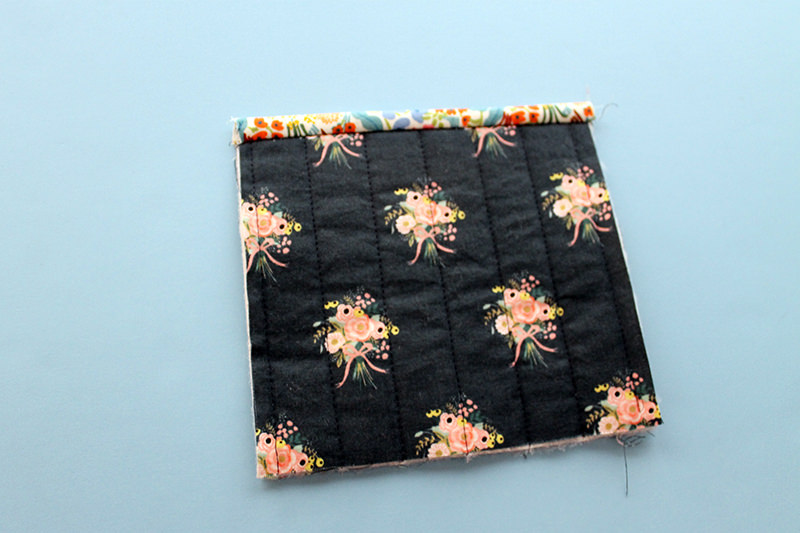
Place the pocket on the front of the main piece and stitch the pocket down on the three outer sides with a 1/4″ seam allowance.
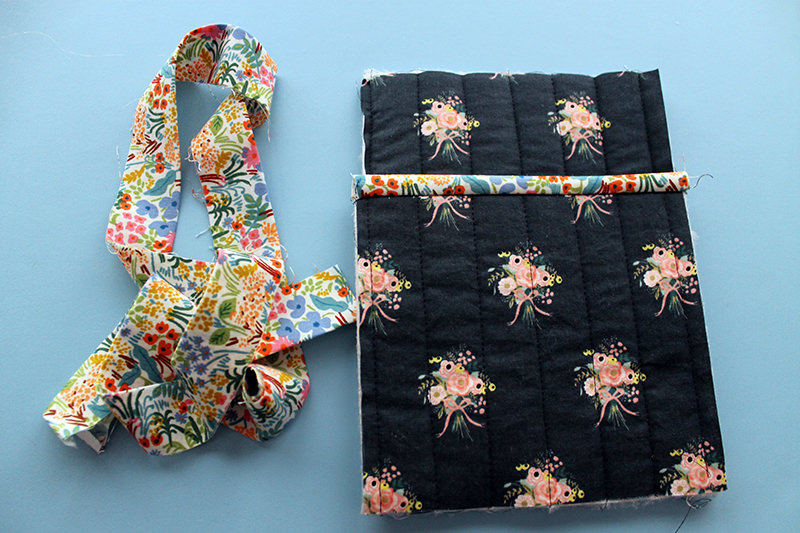
Make the loop with the 5″ piece of 2 1/2″ fabric.

Top stitch the non-folded side of the loop.
Place the loop in the center of the back of the potholder and separate the ends just a bit then stitch down.
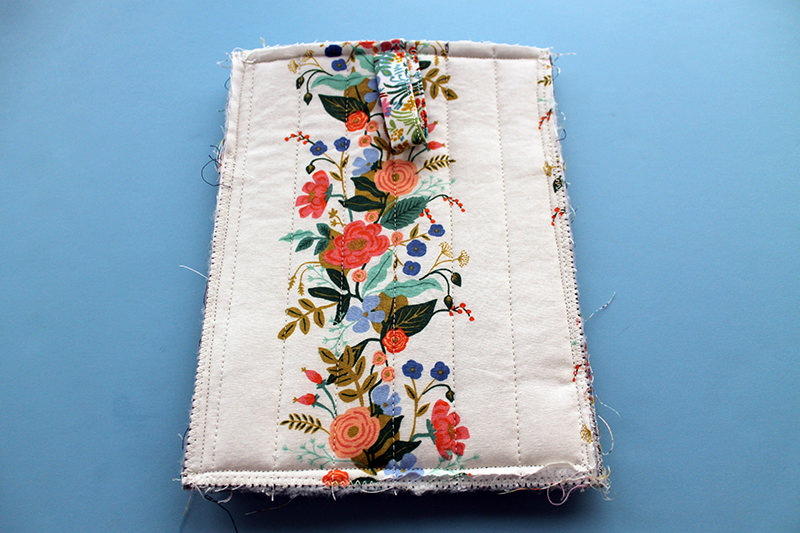
Stitch one short end of the 32″ piece of trim under 1/4″ then start placing the binding on the side exactly like quilt binding.
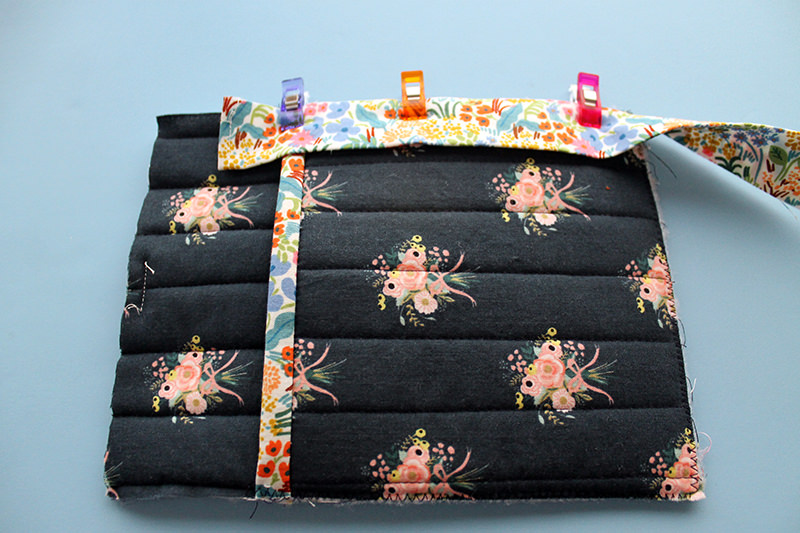
Start stitching a couple inches from where the binding starts, stitch it down and miter all the corners. At the last bit, tuck the end into the beginning piece, trimming it down to about 1″. Then stitch that seam down.
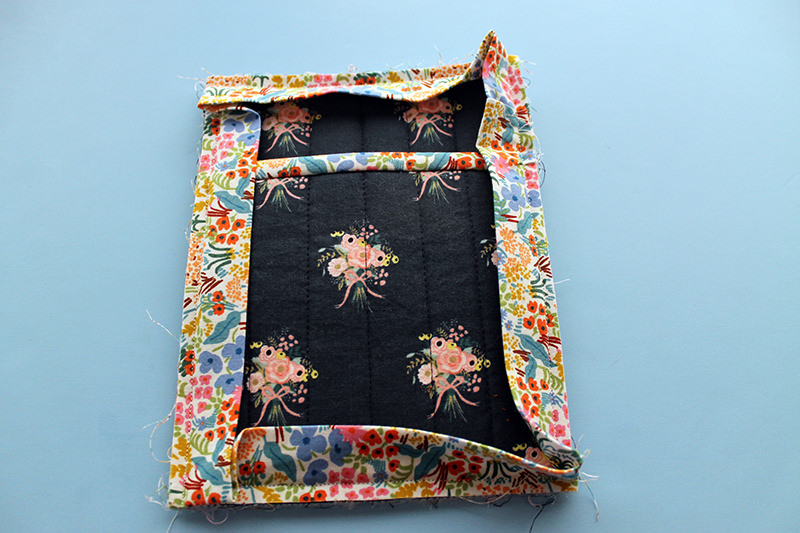
Flip the binding over to the back side, making sure more of it is on the back side so it will be caught in the stitching. Turn to the right side and start stitching “in the ditch” in the area between the upper left hand corner and the loop. Continue all the way around to the start then flip the loop up and continued stitching over the loop.
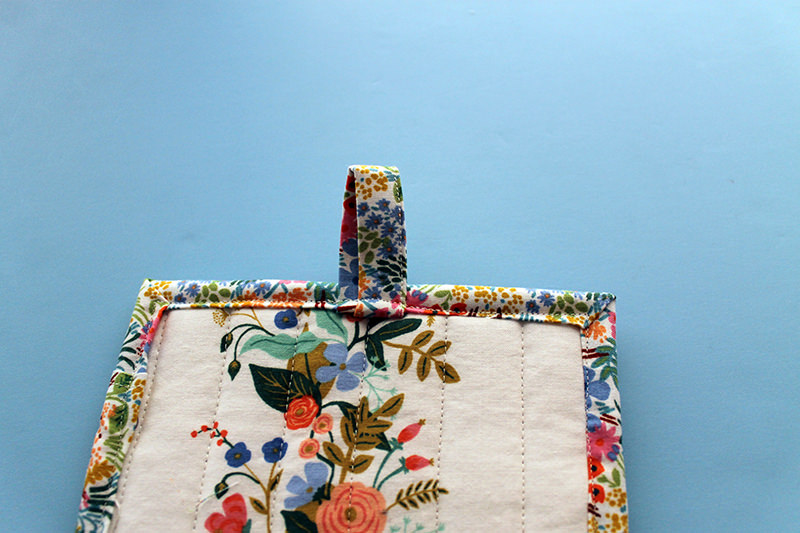
I think of the three styles I made, I like this one the best. And now I have six shiny new potholders with no stains or burn marks!
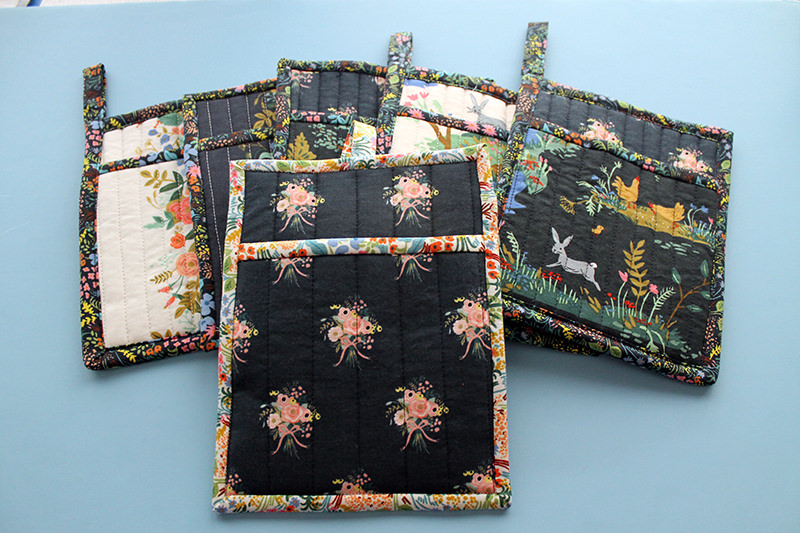
And my friends have two cute Autumnal themed potholders and one hot pad!
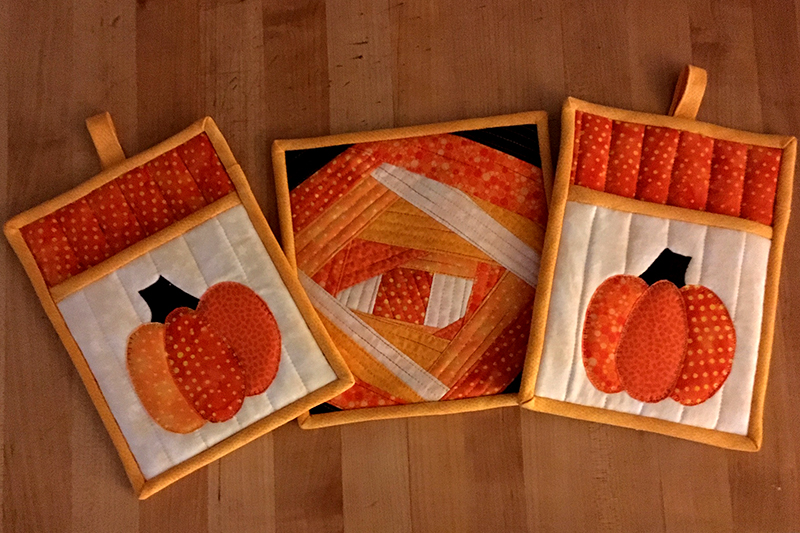
And next week–hot pads! I loved making that one in the center!
Discover more from
Subscribe to get the latest posts sent to your email.

Comments
DIY Potholder with Hanging Loop — Another Version — No Comments
HTML tags allowed in your comment: <a href="" title=""> <abbr title=""> <acronym title=""> <b> <blockquote cite=""> <cite> <code> <del datetime=""> <em> <i> <q cite=""> <s> <strike> <strong>